Click below to go back to the hub:
Hey VideoStar,
It’s time to jump into the Intermediate resources! Remember to take this one step at a time. You don’t need to master all of this at once.
Choose one area at a time that you want to upgrade.
Also a quick heads up that some of these puppies are affiliate links. 🙂
Okay, choose what you want to upgrade and dive on in!
And remember, if you have ANY Qs, shoot me a line!
INTERMEDIATE TABLE OF CONTENTS
STORAGE
When it comes to memory, there really is ONE level of learning (yep, this section is identical inBeginner, Intermediate and Advanced).
External storage is the KEY to making sure you give your computer the memory it needs to operate. Video can quickly eat up any computer’s memory.
Pick up an “external hard drive”, plug it into your computer and sync it (may require a Googling or two). Then simply save your videos onto this device.
BONUS TIP:
External hard drives can also be used to back up your computer. If you buy two drives, you can create a “safety” copy that you can store at a friend or family member’s home – or in your safety deposit box.
This way if anything wonky happens, you have a copy of your videos and your work off-site. Win!
(Just make sure you can update it regularly).
Here’s the brand I use:
LIGHTING
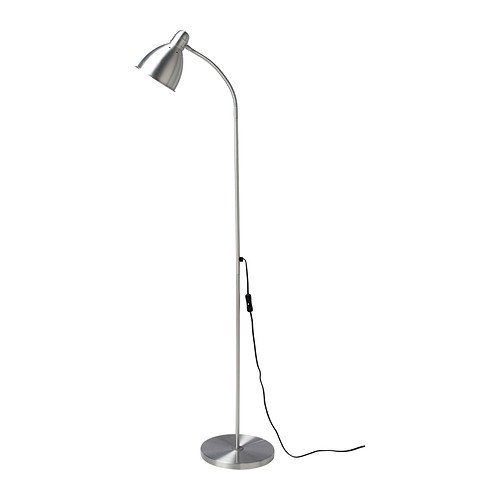
HOUSE LAMP
Use a directional house lamp this one from Ikea/Amazon AND get your hands on some Daylight light bulbs
.
PROs:
- Minimal tech to learn.
- Is better than using other house lamps because you can point the light where you want it.
- Can shoot indoors and have okay lighting.
CONs:
- Won’t look as good as the bigger lights.
- Won’t cast as much light as the bigger lights.
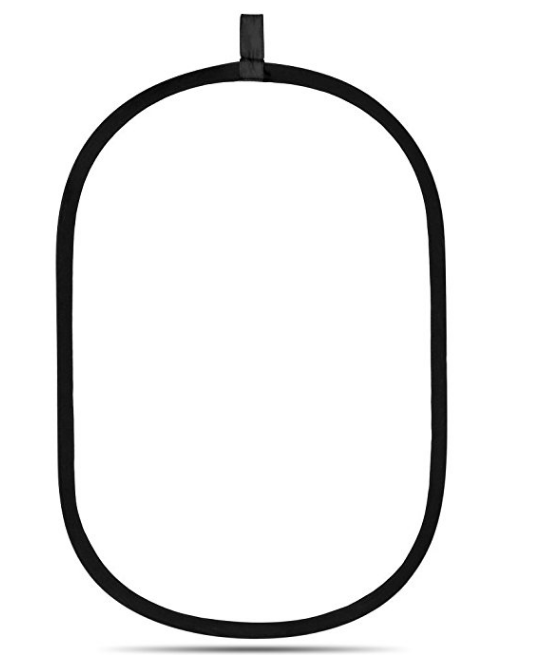
USE A BOUNCE
Another option under the intermediate section is to use what’s called a “Bounce”.
You literally use the power of the sun to bounce light onto your face, to fill shadows and create a more flattering effect (more on how to do this in the Bonus section – the video on Lighting.)
I use something like this, but if that looks too scary, you can simply grab a foam board
and use that.
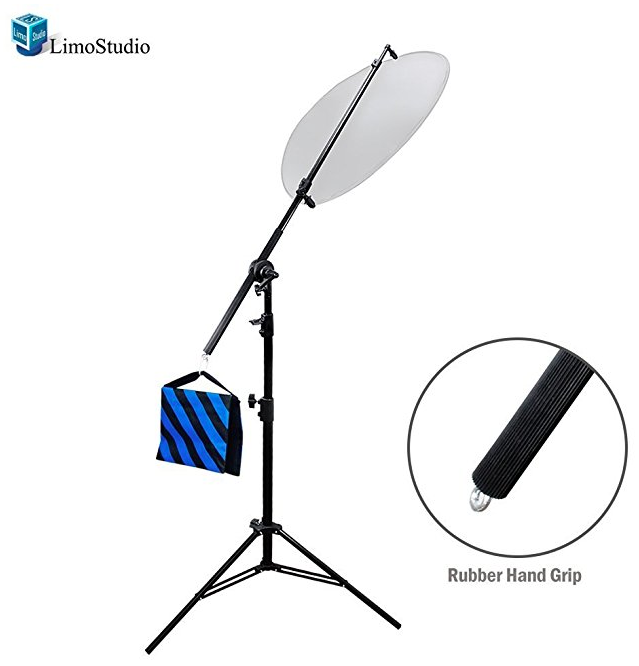
BOUNCE STAND
To mount your bounce, grab this all-in-one stand.
(NOTE: does not come with the bounce. Must purchase the bounce separately.)
CAMERA
When you’re shopping for a camera, there are 5 key things to look:
- Has a jack for an external microphone to plug into.
- If you’re doing your own filming, a flip screen comes in handy, so you can see what the shot looks like while standing in your position.
- Fits your budget.
- Isn’t too big a leap, technically. The most important thing is that you feel comfy pressing record.
- Is High Definition (HD) quality – just ask the sales person.
I suggest grabbing the Canon VIXIA Camcorder or the Canon Powershot G7.
The VIXIA (comes with camera AND accessories):

The Powershot (also comes with camera AND accessories):

PROs:
- Both these cameras are GREAT ways to get a better image without having to learn all the ins and outs of more complex cameras.
- They have the all important flip screen.
- You can easily plug in your external microphone.
- Are fantastic intermediate steps towards creating more dynamic videos.
- The investment for the VIXIA is suuuuper doable.
- Not super hard to master.
CONs:
- The investment for the Powershot is greater than the VIXIA.
- Both cameras will have small learning curves when compared to your smartphone or webcam.
SOUND
NOTE:
In this section, check out your options below, and make your choice based on these factors:
- Visibility of microphone.
- Cost.
- Size of microphone.
- Do you want to be able to attach it to your clothes? Do you want it to be big and obvious on your desktop?
IMPORTANT TERMS:
Lavalier – A small mic that you can pin to your shirt.
Wireless lavalier – there is no wire physically connecting you to your camera, so you can move around with ease. No more accidentally knocking the camera over when you go answer the door (hehe).
Wired lavalier – there is a wire that connects the microphone to your camera. So make sure you unplug before you go answer the door.
Shotgun microphone – larger mics that you’d place on your desk (think podcasters).
Groovy!
Here are the mics I recommend at this intermediate level.
LAVALIER MIC:
The mics listed below can be used for your smartphone, tablet or computer!
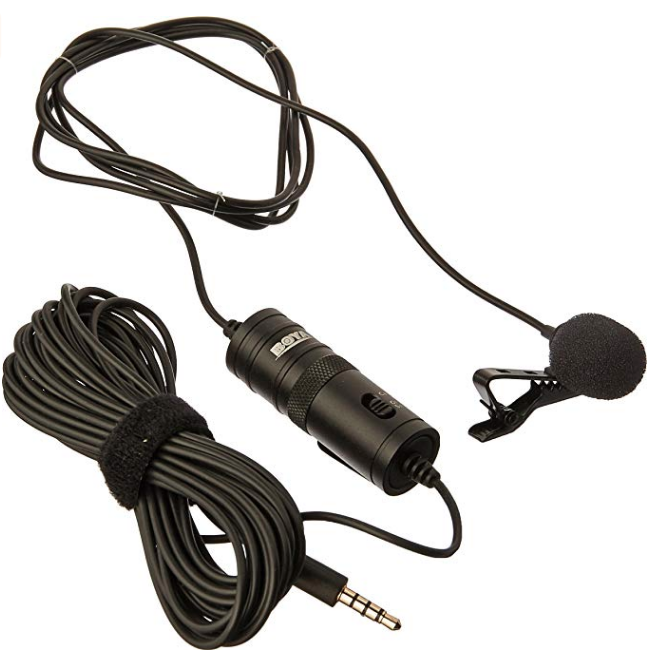
As a starter, I recommend this sweet lil WIRED lavalier by BOYA BY M1 or this one by Rode
.
BOYA:
Rode:

PROs:
- Get clear sound without spending a ton!
- Suuuper simple to get up and running. Just plug them in and clip them to your lapel.
CONs:
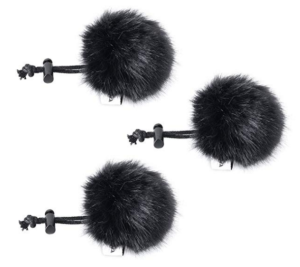
- Need to purchase a “WIND SOCK” if you’re shooting outside. Wind socks slip over the microphone and block the wind so you can still get clear sound.
- NOTE: Test the wind sock and make sure it’s working properly.
I also suggest that you pick up an extension cable so that you have more wiggle room for the Rode mic (the cable it comes with is only about 5 feet long).
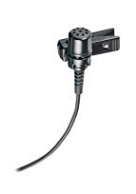 THE INVISIBLE LAVALIER MIC:
One step up in intermediate tech is a mic by Audio-Technica. They make affordable, INVISIBLE Lavalier mics.
PROs:
- You can easily hide the mic UNDER your clothes so it’s INVISIBLE to the camera.
- Super cheap.
- Decent sound.
CONs:
- Need to purchase a “WIND SOCK” if you’re shooting outside. Wind socks slip over the microphone and block the wind so you can still get clear sound.
- NOTE: Test the wind sock and make sure it’s working properly.
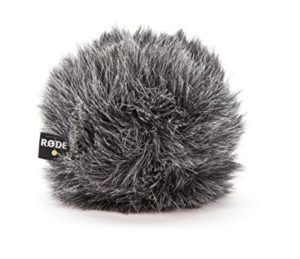
THIS WIND SOCK will work for most lavalier microphones and will block out a decent amount of wind if you’re shooting outside:
SHOTGUN MIC:
For your smartphone or tablet, pick up this great mini shotgun mic by Rode.

PROs:
- Doesn’t need batteries – runs off your phone’s power.
- Clear sound.
CONs:
- Need to purchase a “WIND SOCK” if you’re shooting outside. Wind socks slip over the microphone and block the wind so you can still get clear sound.
- NOTE: Test the wind sock and make sure it’s working properly.
Grab the WIND SOCK for the mini shotgun:
For your computer, The Blue Yeti is a great shotgun mic.

The Rode Podcaster is also a great option to use with your computer.

PROs TO BOTH:
- Good desktop mics.
- Great if you want your videos to look like a podcast, with an obvious microphone in the screen.
CONs TO BOTH:
- It’s not great if you want to stand up or move around a bit in your videos.
- If you want to hide your mic, this is not the way to go.
KEEPING THE CAMERA STEADY
Dolica:

Magnus

PROS:
- Keeps your camera steady at a good price.
CONS:
- Not as solid or sturdy as the advanced options, but will do the job in a pinch.
EDITING
If you want to DIY your video editing, I recommend you stick with relatively simple softwares:
Mac – Screenflow (scroll down the linked page to find “Screenflow”.
PC – Camtasia (also makes a Mac version).
SOFTWARE PROS:
- For the DIYers who don’t want a super duper ginormous learning curve in the editing suite.
- They’ve got lots of bells and whistles, and it’s great for a start up DIYer.
- They can both also record via your webcam and capture your actual computer screen.
- They both have FREE trials.
SOFTWARES CONS:
- They can get a bit glitchy, which can make the editing process a bit wonkier than it should be.
- If you want LOTS of pro customizing features, these will eventually fall short for you.
- While the learning curve isn’t steep compared to the pro software, expect to spend a bit of time learning how to get comfortable with how it works.
BUMPER
You may be asking: What the heck is a bumper?
It’s the graphics/photo thingee with music underneath it that goes at the beginning and ending of videos (mine has my company name and shining sundogs in it).
SEE:
Keep in mind that your Bumper should do 4 key things:
- Include your and/or your company’s name.
- The name of the video series/channel, if it has a name. (Like if I wanted my video blogs to be called say, Shine-TV, or something.)
- Set the tone and vibe of you and your biz (playful, uplifting, empowering, etc).
- Grab your dream clients’ attention.
HOW TO GET ONE:
- If the thought of having a bumper at this stage is too overwhelming, don’t get one yet!
- Or you can get a simple bumper made with your logo and tagline from Splasheo. They have pre-made templates you can choose from. They simply add in your logo, name etc.
- If you want a fully customized bumper (woooo!), it’s time to outsource to an editor like myself, who knows how to use animation software and has a creative eye. 🙂
NOTE: There is a DIY option in the Advanced Resources page.
OUTSOURCING PROs:
- Takes the tech headache away.
- Have a beautiful, branded, professional intro and outro for ALL your videos.
OUTSOURCING CONs:
- If you go fully customized, it can cost $800+ to hire someone to make your bumper.
BACKDROPS
It’s time to make your backdrop look + feel more profesh!
Spruce up your existing home/office, find a new well lit location or investigation outdoor possibilities.
There are a few important Qs to ask yourself:
- Is your current backdrop cluttered?
- Do you want to include your brand colours in some way?
- Do you want a simple, clean look?
- Do you want to include an interesting wall from your home?
- Are there any sightly things like wall plug, hanging cords or light switches in the background?
- How do you want your backdrop to feel?
- Are you in motion (walking down a street, walking in a park)?
- Are there any AMAZING locations where you can shoot nearby? (NOTE: Keep it simple for outdoor locations. Most places technically need shooting permits. But if it’s just you and say, another person, you should be fine).
- Are there any local hotels or Airbnb locations (with GREAT natural lighting in the suites) where you can shoot to give your videos an instant professional feel?
- What kind of decorations can you include (such as flowers, other plants, books, a table, etc)?